Friday, 18 July 2025

Squeeky boot door

Now I have worked on the boot courtsey light I had used the backdoor a few times. And it started to develop an awful squeeky noise when opening and closing. The struts were still good though. So I ended up spraying grease on the hinges, this wasn't helping though, despite they were being rusty


I also sprayed the strut arms but that wasn't helping either. Turned out it was the strut ball joints were causing it. So I had that sprayed as well and this did the trick


On this photo its more visible that dirty rusty brown grease is leaking out of it


So I sprayed up also all the other movng parts


And the locking mechanism


And the hinge of the fuel capopening was a bit rusty too but was working ok though. Nevertheless sprayed that up in any case:


And all the door hinges as well. Needless to say, all is going smooth again. Another step closer to perfection.

Thursday, 17 July 2025

Boot courtesy light repair

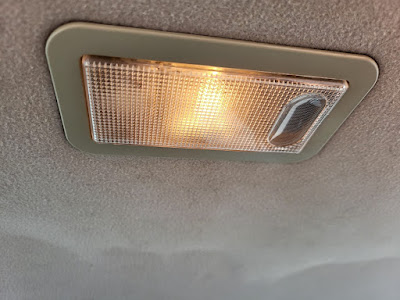
One thing I noticed was the boot courtesy light not working. The one in the ceiling was working OK. 

I thought it would be a simple lightbulb replacement but no.

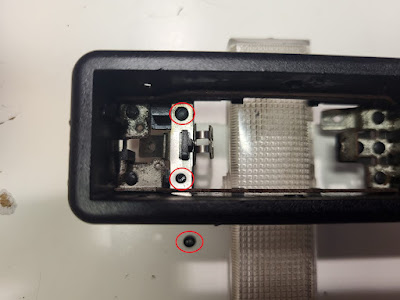
So I removed the lighthousing and checked the lightbulb. This looked fine though 12V 5W. I noticed the metal holder was slightly lose. Apparently one side had a small piece of mounting plastic broken off. So the lightbulb wasn't properly fit and a little shaky as a result.This wasn't however the cause of the light not working


Luckily the small plastic dot was still floating around in the lighthousing. So I had this glued back. On the photo you can see the red circles for demonstration purposes :-) 

The glueing thing worked out quite well, and all is firmly in position again. You can see on the next photo the lense as well which was quite dirty. So I had that rinsed with soapy water and a brush


So all is looking good and shiny again:


Even though this courtesy light has some kind of push button it does not do anything really. You can push it inwards but it will not trigger a cut off or whatsoever. Oh well. 

When I had it removed I noticed one wire end did not look original anymore. A different thick wire with a aftermarket connector:


So next I checked the light switch:


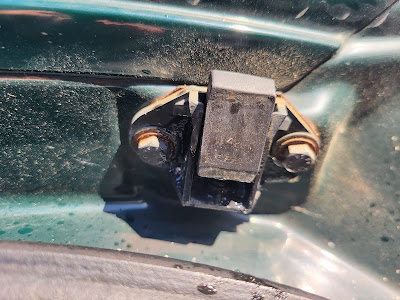
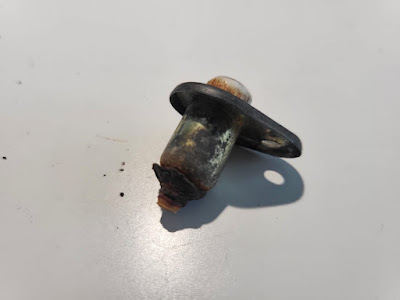
Of course it was terribly rusty and in a poor condition. When doing voltage measuring I sometimes got mixed results from nothing up to nearly 6V. When measuring directly to a proper metal ground I got 12V. When fiddling around with the connector it snapped off:


So it was very likely this connection had some mass problem. Doing further checking of the cable harness I noticed the extra black tape used as isolation. So undoing this the original mass cable (purple) came to light. I could not trace it back any further to the light-switch. I'm not sure what happened there but they have added a new bypass mass cable between the switch and the courtesy light. Typical. 


The purple mass cable still had the original connector attached to it. As said I could not trace it back to see where it stopped - it went into antother cable section into the rearbumper. To much work to dig into to make it original again. 


For now I reused the existing cabling and used new cable connector shoes. But the real issue was the broken and rusty light switch.

So I fired up a working online EPER site to look up the part details. Finding a working EPER site was a struggle as usual. Then I noticed the Kappa SW is not listed, the sedan and coupe are available though. I think this is because the SW is build by Pininfarina and as such is using their part numbers. Sigh!

So I searched for Fiat and Lancia light switches and was lucky to find it somehow. This particular switch was used on a Fiat 124 spider! Which of course is a Pininfarina design :-)   The part number was 4258476 :


The difficulty is now to find an affordable one with normal shipping costs. A lot of companies did happen to be offering this outside of the Netherlands. Some affordable but then having hefty shipping costs. So I ended buying one via Martin Willems for € 3,50  Shipping was twice as expensive. Still cheaper then driving up and down.

The one I got supplied was having black plastic though and the push pin was slightly longer as well


But it was functional and all fitted perfectly. How nice is that:


And more important, the light is now working again:


But there is still one issue with it. The used screw in the light switch, is not 100% fit. Either the screw is not original or the hole is just to wide to tighten the screw firmly. The screw is making the ground contact as the other part of the switch is touching the paint and not metal ground. Meaning a lose scew is resulting in a poor mass contact. I checked and indeed you can move the switch a little and the light goes off. The used screw is of course a bit rusty by now but I also consider it to long and doubt if it's the original one. I will have it replaced in any case.

Sunday, 13 July 2025

 And so it finally happened. I had the Kappa Coupe swapped and parked. The SW is now insured and roadtax eligble. Meaning I can now use it as my daily driver. 

And the first issue occurred yesterday on my way home. One tyre was nearly flat. Despite I had them all checked and pumped up beforehand. I made it to the gasstation and pumped it up again and it remained OK since. I suspect that maybe the air-valve played up somehow when I had all tyres checked. 

Next I had filled up the gastank, emptied a bottle of injector cleaner in the tank, went through the car wash and things looked already nicer. 

Other than that it drives very nice and smooth. But the car had a muffy smell on the inside. So more cleaning on the interior had to be done today. Starting off with cleaning the front windowshield for better visibility. Cleaning the dashboard with cockpit spray. And cleaning the front carpets:


Using this interior cleaner I once bought at the Shell shop:


This worked out quite well, looking much better and fresh now:


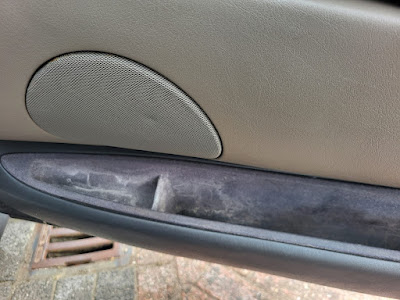
Next I wanted to clean the pockets of both frontdoor panels as they were very dirty. And the interior cleaner was not sufficient. 


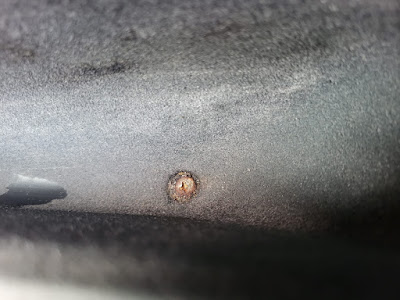
I wanted to remove these pockets for better rinsing and cleaning. You can spot them easily on the inside, both were very rusty and dirty. But once unscrewed I could not take these "pockets" out. Not sure what is holding them in. I did not want to cause any further damage.


So I instead I soaked them with vanish. 

This mostly did do the trick. Afterwards I cleaned it out further with a towel. But now all is dry again there is still dirt left. I will have to repeat this again. 

When doing a small drive again I noticed the windowwasher fluid was emptied up. So on the Shell gasstation for a fresh bottle summer screenwash. 

For now I had enough, the car is at least freshened up a little on the inside. So the next drive should be more pleasant. There is still a lot more cleaning and polishing to do. Plus tons of little repair items. 

Wednesday, 4 June 2025

Airco working and register stats

The garage had forgotten to fill up the airco and it's done now. Yes, it's blowing cold air again. So happy with it. And again a small drive up and down in the street. It drives so well and sounds so nice. 

But the coupe is so nice as well. And only 83.000 km on the odometer. The SW has a 210.000 km on the odometer. I rarely see Kappa SW in the wild on the road. I wonder how many there still are in the Netherlands?

I just checked via www.kenteken.tv and its 40 in total. But only 3 x 2.4 SW
And quite a few coupe's: 124 


Out of curiosity I checked and found the other 2x 2.4 SW's in the Netherlands. 

The first one is offered for sale at: https://www.jacco.nl


It's an imported one with 153.000 km and costs € 9.450,-  Number plate T-865-KD


And the other one is offered for sale at https://www.martinwillems.nl via


It's an original Dutch car with unknown mileage and no MOT since 2017. It has a black leather interior. Offered as a project car for € 1.950,- 


So by the looks of it I'm the only Dutch private person driving an original 2.4 SW version :-)

Tuesday, 3 June 2025

MOT repairs

 As mentioned previously, I was off a few days and spent 1 day to work on the Kappa SW. 

Now the stabilization bars were done I could look into the brakes. All brakes had to be freed up.

I started at the backside but effectively these were spinning freely. Which is not a surprised as these were renewed when it bought the car 5 years ago:

https://erwinkappa.blogspot.com/2020/10/mot-maintenance-bill.html


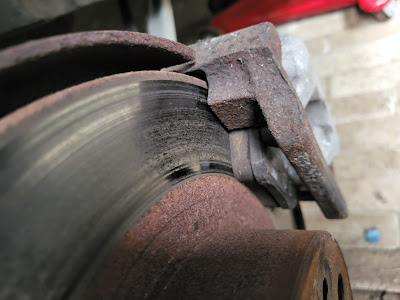
Still I took it off and cleaned the whole lot with a steel brush on the drill machine and lubricated the slider bars of  the calipers


So the backside was pretty easy. The front however was indeed more problematic. The brake cylinder was slightly corroded and dirty thus playing up a little.So this got cleaned up and lubricated.

Luckily I had once bought this brake kit, so I easily could push them back. And repeated this a few times. Also the front brakes got cleaned up with a steel brush and lubricated the caliper pins. 


The car had on all wheels new brake pads. So now the car brakes are working properly again.


Afterwards I have been driving up and down the street and tested the brakes to ensure there were no surprises.

Another reported issue was potential rust / bubbles on one of the braking pipes (rear left). I could not easily spot this though, but could see one pipe having a little bubble on the coating


So with sandpaper I removed the coating till it was blank. The bubble was definately not a result of rust, so all was good though. I sprayed the whole lot with rust protection primer:


I also replaced both light bulbs of the licensplate holder as a remark was made that one was very dim. And indeed it was. Easy fix.

So I returned the car to the garage for a new MOT. I told them about the stabilization bar replacement, the easiest job turned out to be a hassle and required a grinder in the end. Then I was informed, these bars were not even a MOT fail. Sigh! Although they had a bit of friction, hence it was mentioned. Oh well, it should drive a little better now. 

And the good news is, by now the MOT is a PASS !!

So I can start driving it again. Which is my plan indeed. I will make it my new daily driver and park my Kappa Coupe for a while. The intention is to tackle all other remaining bits and pieces slowly one by one.

Sunday, 25 May 2025

MOT follow up

I had the Kappa SW MOT done but it did not pass. There were a few minor remarks which I need to sort out:

- All brake callipers need to be freed up. Clearly a result of not driving it over the past 2 or 3 years. So I likely need to remove them all and clean up.
- One brakehose-piping having a small spot of corrossion - rear left side.
- Both stabilizor links backside poor.

So I figured to tackle the simplest job first and ordered a pair of new stabilizor links. Including shipping costs this costed only € 25,-


Although everythings looks a bit rusty it's only surface rust. In fact it all felt very firm, so not sure why it's considered a fail. 

And of course it turned out to be a dramatic job as the bolts wouldn't come off easily, despite using a air hammer and various other brute force methods. So I ended up using the grinder to get it removed. The other side was of course similar. 


But hey, presto:


I also quickly inspected the brakes and the discs and the pads looks very good. So only the calipers needs to get a good cleaning. Coming week it's going to be rainy and I'm off two days so I think I know what I will be doing. 


Looking underneath perhpas the tie-rods could have done as well, somehow they were good enough for the MOT. I still can consider that later on.

Wednesday, 23 April 2025

New radiator + airco evaporator/condensor

I'm glad my previous blog update did contain the background regarding this topic. That saves me a lot of typing. Long story short I had ordered a newly build ALU radiator including evaporator since these are no longer obtainable. I had it ordered via autosklep.pl (Marcin GruchaƂa) who is specialized in Lancia parts from Poland. It took a while before it was created and due to being busy with other stuff it took me equally a long time before it was installed. Here is the item unpacked:


And here I have mounted the fan unit:


And put back into the engine bay:


It all fitted perfectly, so hooking up all the cables and hoses again. Went to the gaspump to get additional cooling liquid and presto. All working fine again and no leaking. 

Now I need to make an appointment with the garage to get the arico refilled and checked. 

I also took the opportunity to make a small spin up and down the street after heating up. The engine is so smooth and it drives great. Took this photo afterwards and it does look really nice but in reality the car has much optical issue's and other minor items to be sorted. 

Lancia Kappa booklets / manuals

I was also lucky to have the original Lancia map with the service, warranty and manual booklets. Unfortunately it does not have the Lancia c...